Somehow, I found myself with a lot of plastic pears (long story, don't ask). Simple, plain, boring, and cheap.
You already know what I do to simple boring objects.
I love family traditions. Something about doing something the same way every year calms and excites me at the same time.
Here in Israel we are in the midst of celebrating Chanukah, a holiday that commemorates the miracle of light. Every night we light another candle in the Menorah, for eight nights.
But for our family, the preparations start the night before. We light the menorah on a side table near the window so people outside can see, so we need to move around a lot of furniture to make that happen. The big empty space by the wall where the side table usually stands can only mean one thing - It's Chanukah.
My childhood took place in two different continents. We went back and forth between Israel and the USA until I was twelve. We never spent more then two years in one place - moving around many neighborhoods and schools. The years in America were spent in a classic suburban setting - a front and back yard, plenty of open spaces but very little independence, mainly due to my parents feeling it wasn't secure enough for us to walk around on our own. The years in Israel were spent in Jerusalem, a busy city full of people, traffic, cafes and the regular hustle and bustle of a busy city. We were free to take the bus and walk around the city as we pleased.
Sometimes I look at my kids and I realize they haven't been out of our community in a month (!) No stores, no traffic - just the quiet Israeli countryside. I find myself feeling bad for them, even though I'm pretty sure they could care less. They seem perfectly content.
This week we went out for a walk in the woods surrounding our house. I took pictures while my kids ran around, climbing, shouting, having fun.
We gathered branches we found lying about to make a winter bouquet. When we came home I made a couple of different bouquets. Fist, I took some Holiday Ornaments from my shop and hung them on the branches set in a vase. This would look equally pretty on a branch hanging from the ceiling.
For a more colorful bouquet (but still super simple to put together) you can stick Washi Tape on the branches (I chose neon pink and a minty green color for the tape).
Washi Tape makes everything better
A little while ago it occurred to me the longest I've ever lived in the same house has been the Caravan we're living in now while we're waiting for our house to be built - eight long years - and that kind of freaked me out. I don't like to settle down - I love moving around and discovering new places. But this week with my kids in the forest, I felt content being exactly where I am, no matter where we'll be tomorrow.
Have a lovely winter,
Elisheva
P.S. The ornaments are for a limited time - until January or when they run out - whichever comes first, if you like them you'd better hurry:)
In Israel, we don't really have Autumn, or Spring for that matter. Both of these seasons take about two weeks start to finish. Mostly it's summer, and a bit of winter. It has rained a bit lately, giving me a little preview on what winter will look like. This preview was extremely wet, and muddy.
With two kids in and out of the house all of the time, I know I need a new system for keeping our entrance in tact. Not that there is much of an entrance, just the front door and a wall - but still.
So it's time for a DIY roundup. And even though my husband gets so annoyed with my projects (I'll admit that normally happens when I don't quite finish them. Which is often.) this time I know it's different, b/c the ideas I've found are (mostly) super easy.
1. Wall Hooks
Aren't these wall hooks so cute? This is a project from the ever so talented girls over at Snug Studio. They're made from children's blocks!
You can see the full tutorial over on the Snug Blog
These hooks are really pretty as well, I'm not sure how they would hold up with coats hanging on them.
You can buy a ton of different mats on the cheap at your local hardware store. But wouldn't you rather have a cloud shaped mat? Anyone could make this - it's a simple Ikea mat cut into a cloud shape. What are you waiting for?
For me, this is the biggest problem. Turns out little kids have a lot of shoes. And boots. And slippers. And gross wet socks (don't you just hate wet socks?). I like what I found over at Not Martha. The way the shoes float over the floor, it look pretty cool, don't you think?
Last post I wrote about coffee table styling ,and now I'm going to let you in on a little secret.
I don't own a coffee table.
This wasn't always the case. We used to have a nice wood table one a friend made us for our wedding. It had a large shelf underneath - a must for a magazine junky like myself - and the tabletop was perfect for our humble entertaining needs.
But then we moved into our teeny tiny Caravan (where we've been living for the past 7 years, waiting for our house to be built) Our living rooms is long and narrow, and the coffee table wasn't helping our somewhat awkward floor plan.
So temporarily, until we move into our new home (they started working on the foundation about two weeks ago, yikes!) we have no intent on buying a coffee table.
How do we have guests over in the living room? I bought two small side tables and put them on either ends of the sofa, and when people come I move them into the middle of the room. I'm always looking for more ideas and sizes for side tables - the kind that can wait silently by the sofa until it's there turn to take center stage.
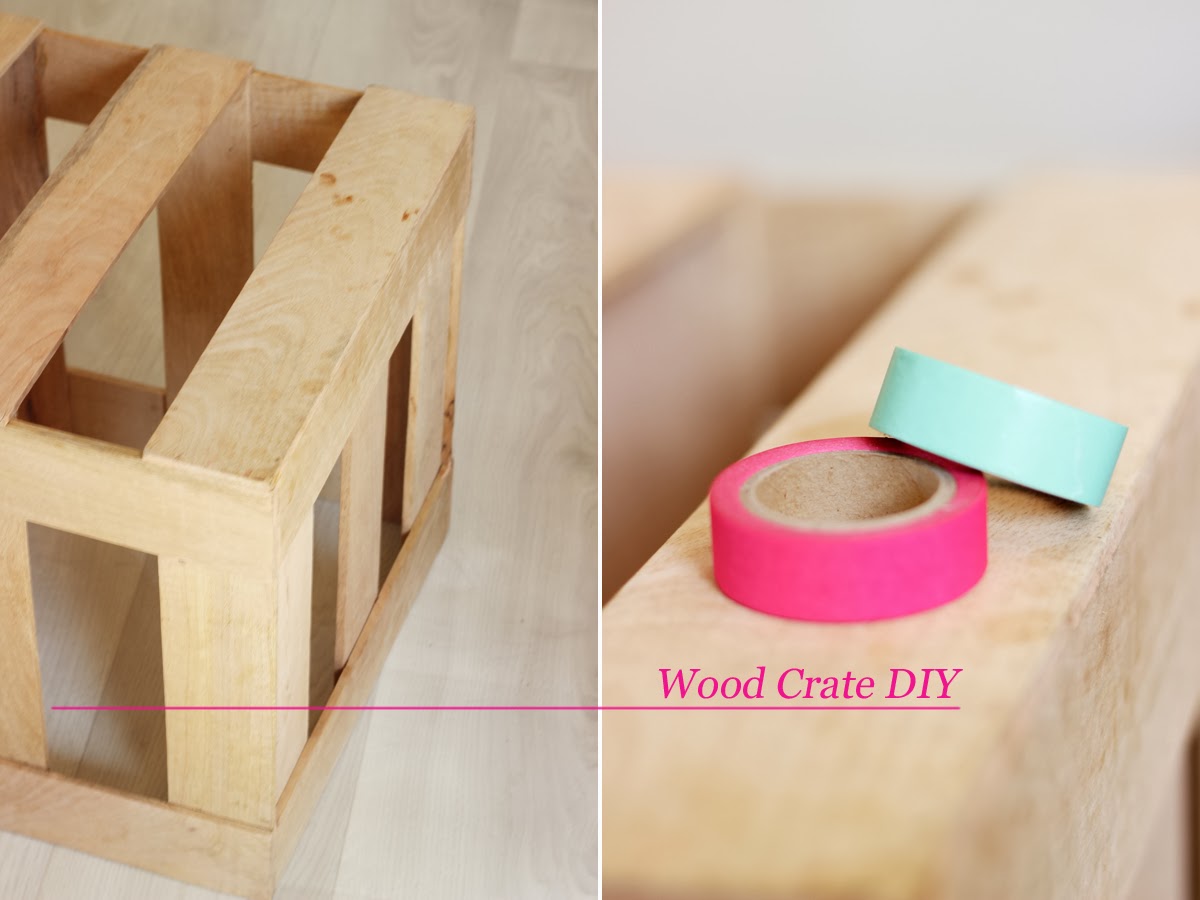
And then the nice ladies at LittleLivingShop contacted me, and asked me if I was willing to create a DIY tutorial with their set of three wood nesting crates.
They sent me the three crates, nesting, with no instructions.
I turned them over again and again, waiting for inspiration to strike. Meanwhile, I decided I would paint a geometric pattern on top, without knowing what they would be. I cut masking tape in the pattern I was thinking of, but while I stuck it on the crates I fell in love with the shape the tape was making. I quickly decided to forget about the paint, and substituted masking tape with Washi Tape. And I am so happy with the result.
Using a ruler and a pencil, I lay out the corners of the design. I then stuck the wash tape on and with an exacto knife I cut off the edges.
Other then the fact this leaves no mess behind, you can change the Washi Tape pattern whenever you like. You can use different colours, patterns - whatever, and you don't have to be worried about not liking the end result. It's so easy and fast, you can always just redo it.
At this point it was clear I would be using the crates as tables. Because there are big gaps between the boards on the table, I had some plexiglass cut to size and lay it on top of the Washi Tape pattern. This also protects the tape from spills and little hand that like to peel stuff. Bonus - you can wash spills and fingerprints with a sponge in your sink.
You can use these tables as side tables by your sofa (or rocking chair:), you can even nest them to take up less floor space- and push them into the center of the room when you need them. The neon colours give a really nice contrast to the wood, and the geometric pattern is a bit of an unexpected surprise.
Hello Everyone,
In Israel we are nearing the High Holidays which means gifts and more gits. I have been very busy at the studio, sending packages to happy givvers. When I give gifts, I like to add a little extra something to make them feel more personal. So today I wanted to share a DIY for clay gift tags which add that personal touch and make your gift really stand out. You don't have to be a talented crafter with time on her hands - this one is simple and fast and looks chic and modern.
What's cool about these tags is that they're ver versatile. You can make them into key chains, or tie them around silverware or napkins at every place setting that your guests can take home. I'm sure you'll have plenty of new ideas once you try.
So here is what you need:
- Polymere Clay in white
- Some sort of rolling pin
- A cup to make circles or a dull knif for any freestyle cutting you'll be doing - I used a butter knife. Don't tell my guests:)
- Rubber Stamps - I used letters but you can use shapes as well.
Roll out the clay and make your shapes. Make a small hole for the ribbon. As for the shapes, I made some circles with the cup, then a couple of oval tags - and some fish.
Why fish?
1. Because fish are pretty and easy to cut with a butterknife and
2. Fish are a big symbol for the Jewsih New Year - Rosh Hashana, specifally the fish head. It was once customary to searve a fish head at the dinner table (disgusting, right?) and to bless each other with the saying "may you be a head and not a tail". What it means is that you should be a leader. So we don't searve fish head anymore, but we still wish each other to be heads, not tails:)
Now is the fun part. Stamp away, preassuring the stamp as much as you'd like.
Bake the tags according to the instructions on the clay, and Voila!
You now have Clay Gift Tags for all of your gift givving needs.
You can personlize these with names, or messages like I did. I also added some gold leaf to one of the fih, but they look great in white, too.
And if you like the wrapping papers I used, you'll be happy to hear I'm giving them away in the next post a a printable to download along with other fun prints.
So, untill nex time - I wish you all to always be heads, never tails.
:)
Elisheva
The Jewish New Year - Rosh Hashana - is nearing, and I thought I'd share one of may favorite holiday traditions growing up.
It has to do with the bread we eat, Challah, on the first night of the holiday. This braided bread is eaten every Friday night and Saturday afternoon throughout the year, but unlike every other week, on the High Holidays it is baked into a round loaf, symbolizing renewal.
Growing up, we used to sneak the Rosh Hashana (New Year) greeting cards we made under the bread cover (they lay covered until after everyone is seated and the wine has been blessed). When my father would uncover them, he'd always be "surprised" to find all of our handmade cards.
We make Challah bread almost every week, and it's surprisingly easy, especially if you have a Kitchenaid. Our guests are always impressed, and because we make a couple loafs we also give them as gifts no neighbors and friends.
So today I want to show you a few simple way to make any gift (especially the edible kind) look amazing - with only a few things you probably have lying around at home. With these tricks even a store bought granola bar could look amazing, here's the how to.
Wrap a piece of parchment paper (I use simple baking sheets cut into strips ) and tie a brown string around it.
The combination of parchment paper + brown string gives a rustic vibe to anything, making perfect for home baked (or store bought, I won't tell) goods.
Or, you can cut tags out of patterned paper and tie them with a piece of ribbon to your loaf. To get the nice neat bow above, wrap the ribbon around the loaf, string both ends into the whole on your tags, then tie the bow.
You can also make rolls out of the Challah dough. Just roll out the dough into a snake about the length of your hand, and tie into a knot. You can then put the rolls into this chic bread basket, which is actually a linen napkin folded and pressed is an idea I first saw on Martha Stewart blog. I used linen napkins from my collection, pressing with an iron as I folded.
This is how it's done:
Fold both edges towards the center (you can leave a bit so they don't meet each other %100), then fold the open edges back, Voila.
And the recipe for this Challah? We use a revised version of this recipe, this is what it looks like after our revision:
1 kilo flour
1/2 cup sugar
1 tbsp dry yeast
2 eggs
1/2 cup Canola oil
1.5 cups water - add more if necessary.
1 tbsp. sea salt
Mix all of the dry ingredients except the salt. Add the oil, eggs and water and knead into dough. You may need to add water - just until the dough is formed. It's ok if the dough is a little sticky, just make sure it's manageable. Sprinkle the salt in and knead for about 5 minutes.
Cover the dough with a plastic bag (not the bowl, the actual dough) - this will keep it moist as it rises. Let it rise for about an hour. Divide the dough into 6 and spread them on a baking sheet.Let them rise again, covered, for another 15 minutes. Braid each 3 pieces into braids, beat and brush an egg over the loaves and sprinkle with sesame and sea salt. Bake in a preheated oven (180 degrees cell) until the loaves brown - about half an hour.
How about you, dear readers? Any special holiday traditions you love? Are they always about food, like they are for me?
This blog is mostly about entertaining.
Mostly.
But sometimes, I like to do something a bit different. In Israel we are nearing the High Holidays. Basically, the entire month of September is filled with Holidays - which for me means a lot family, great food - and fancy clothes. So for the entire month of August I will be posting once a week on ideas for Rosh Hashana , the Jewish New Year - but obviously even if you don't celebrate, you can use the ideas I will share for any Holiday or fancy dinner.
One of my favorite Holiday traditions have to do with Jewelery. My
mother always gives all of the girls (three sisters and one sister in
law) a pretty necklace as a gift. Then my Dad and all of us siblings
give my mother a gift. You guessed it - a Necklace. Sometimes someone
gets creative and gives a bracelet. I think my best pieces are from these pre-holiday gifts. I've already written about my Mothers amazing taste, and this is no exception.
So today in honor of that tradition, I'm sharing a fun DIY for a cool geometric statement necklace. If Hook n' Loop design had a Jewelery line this is what it would look like for sure - clean and modern with a little twist.
To make the necklace in the photo, this is what you'll need:
1. Leather (I used feux) in two colors - black and the trendy gold.
2. Pencil/Pen
3. Scissors/X-acto knife
4. Fabric Glue
5. Ruler
6. Plyers
7. Gold necklace chain and clasps
Here's what you do, from the top left corner clockwise.
1. Measure and cut strips from the leather. The width should be the same on both colors, the black ones should be a bit longer then the gold in order for the black strips to show.
2. Cut the strips into triangular shape at the tip, again making sure the black strips are longer then the gold.
3. Put glue on a bit less then half of the black strip, fold in half and press until it sticks. Make sure there is a loop with no glue at the center - this is where the gold chain will go through.
4. Put glue on the entire gold strip, fold over the black strip and press.
That's it, you now have on piece of the necklace.
String the chain through the leather piece. You can now make some more, or if one is enough for you, attach the clasps to the chain and Voila!
Now have fun with it! You can make different shapes and sizes, like the triangle piece below.
I can imagine this idea in different color schemes, like a dark grey base with a touch of fuchsia, or even the same color with different textures. And even though it was hard finding the time to sit down and craft between Lego games and going to the park (this summer vacation is tiring!, I had so much fun making it, and I hope you will too.
Until next week,
Elisheva
P.S. During next week I will have special Holiday sales on my entire collection, be sure to keep updated on the blog or on Facebook.
If you've found yourself looking up one of these phrases on Google:
1. Activities for summer vacation
2. Stuff to do with kids during summer vacation
3. Cool things to do with kids that are fun and not too messy and photograph well
You've come to the right place.
My childhood memories are filled with bubbles. Growing up in the US, the bubble bottles were kind of chubby, and had a really sweet smell, while in Israel, till this day, the bottles are really thin and the smell is soft. We'd run out of bubble juice so fast, and then my mother would fill them with dish soap solution, but it just wasn't the same. Maybe it's the nostalgia, or maybe it's the fact that bubbles are THE BEST at any age, during the summer I'd say we go bubbling about once a week. I fill a huge bowl with home made bubble solution, and off we go to the park. As for the wands, here is a simple DIY you could do with just about any cotton weave strap (it would probably work with synthetic as well) or rope you may have. I use leftovers from the strap we use for our constantly breaking blinds. I attached two plastic hoops to the rope and knotted them in place - place them fairly close together so a child (or adult, no judgement) can easily hold on in each hand, then close of the rope. If you don't have hoops, no worries! Just make a loop with the strap and tie it in place.
My oldest tied the rope to a stick, and my youngest followed his lead.
The cool thing about these bubbles (other then the fact that they're huge) is that they are great for and little kids and big ones (and there mothers, of course). It takes some practice getting it right, which is great for the older ones, but sometimes the wind makes bubbles on it's own, which is great for the little ones.
How does it work? Hold a loop in each hand and bring them close together. Dip the entire thing into the bowl, making sure it all gets covered. Slowly bring your hands out and separate them - the strap will have a "wall" of soap on it.
You can then blow a bubble with your mouth, stand across the breeze, or swirl around creating your own breeze.
Wanna try this at home? Here is the recipe we use:
Just add 1 cup of dish soap to 12 cups of water, add 2 tbsp. baking powder (not soda) and 1 cup cornstarch. They say it help to let it rest, but I can never wait that long.
If you have a different recipe, or any other bubble related ideas, fell free to post on the comment section.
It's hot here in Israel, and I'm thinking of ways to cool down. This time of year, I like my coffee cold. And I don't mean all those coffee drinks that are basically coffee slurpies, but rather good old coffee, with ice.
The problem with any drink with ice, is that all too soon you are left with a watered down memory of what your drink used to taste like. But what if you could turn that disadvantage into an advantage?
What if as the ice cubes melted, your drink became better?
Hmmm...
Coffee Ice Cubes.
All you need is an ice cube tray, and you're set. (I got a new one at the dollar store and I love it b/c it has makes a bajillion mini cubes - so cute!)
First, make some coffee. I made espresso - but you can make anything you like. Carefully pour the coffee into the tray, and freeze.
Now make some cold coffee with the Coffee Cubes, add milk or don't - it's up to you. As the cubes start to melt - Hallelujah!
You can get creative too by adding things to the coffee before it's cubed - vanilla beans, sugar, Cardamom.... Yummy!
This could work with any iced drink. How about Lemon and Mint cubes in your Iced Tea?
And remember - every drink tastes better when you drink it from a striped straw.
I hope you're having a great summer!
Elisheva
P.S. The coasters I used are from my shop - you can see more here
Sometimes people ask me - where do your ideas come from?
I don't have one answer to this question. A lot of things can spark an idea for a new product - a problem that needs solving, an interesting material I'd like to work with, the internet, of course - each time something different.
I can say that what most of my designs have in common is the large effort I put into each one. A lot of people think of the creative process like a light switching on, an Aha! moment, what many of us call "inspiration" - but for me that is not the case.
I sketch, erase, surf the web, sketch again, fall in love with my sketch, go to sleep and wake up hating my sketch, erase, and start over... In Hebrew we say "inspiration rested on me" - that always makes me laugh - if inspiration is resting why am I so tired...
Sometimes there is a breakthrough, but normally I feel in my heart what the design needs to be, and it takes a while for my hands to get there. If you follow my on Facebook, you see the pictures I sometimes share from the design process. The final result can be miles away from where I first started.
Sometimes I worry I will never get it done in time, that it will never be "just right". But with the hard work, things start falling into place, and my intention is met with the final result. That for me is the biggest satisfaction.
I have only recently started to blog in English, and although I am fluent (my father is American) this is completely our of my comfort zone. Going through my posts in Hebrew and translating them has been quite challenging, and I really appreciate you reading and I do not take it for granted.
So last week I told you I'd be giving you a gift - and I am keeping that promise. If you sign up to get updates - you will receive first notice about special sales, coupons, tips and trick for design as well as a set of downloadable postcards with the graphics I designed for the Coasters and Butterboards at my shop. It took a long time to get them to be just right, and I am pleased with how they came out:)
You can hang them on the wall (like in this last post), send them to a friend, use as a card on a gift - anything really. Here's what you need to do - Sign up at the bottom of this post or to the right. once you finish the Sign Up process (you'll need to confirm the email you'll get after signing up), you will receive a link to download the Postcards. And if you have any trouble, write me at - elisheva@hooknloopdesign.com. I will send them via mail.
I'd love to see how you use them! Send me a photo or upload them on the studios Facebook Page.