Showing posts with label tutorial. Show all posts

Sunday, October 20, 2013

DIY Wood Crate Tables

Last post I wrote about coffee table styling ,and now I'm going to let you in on a little secret.
I don't own a coffee table.
This wasn't always the case. We used to have a nice wood table one a friend made us for our wedding. It had a large shelf underneath - a must for a magazine junky like myself - and the tabletop was perfect for our humble entertaining needs.
But then we moved into our teeny tiny Caravan (where we've been living for the past 7 years, waiting for our house to be built) Our living rooms is long and narrow, and the coffee table wasn't helping our somewhat awkward floor plan.

So temporarily, until we move into our new home (they started working on the foundation about two weeks ago, yikes!) we have no intent on buying a coffee table.
How do we have guests over in the living room? I bought two small side tables and put them on either ends of the sofa, and when people come I move them into the middle of the room. I'm always looking for more ideas and sizes for side tables - the kind that can wait silently by the sofa until it's there turn to take center stage.

Geometric Coasters from my Shop

And then the nice ladies at LittleLivingShop contacted me, and asked me if I was willing to create a DIY tutorial with their set of three wood nesting crates. 

Candlestick Stack from my Shop

I said yes, of course.
They sent me the three crates, nesting, with no instructions.
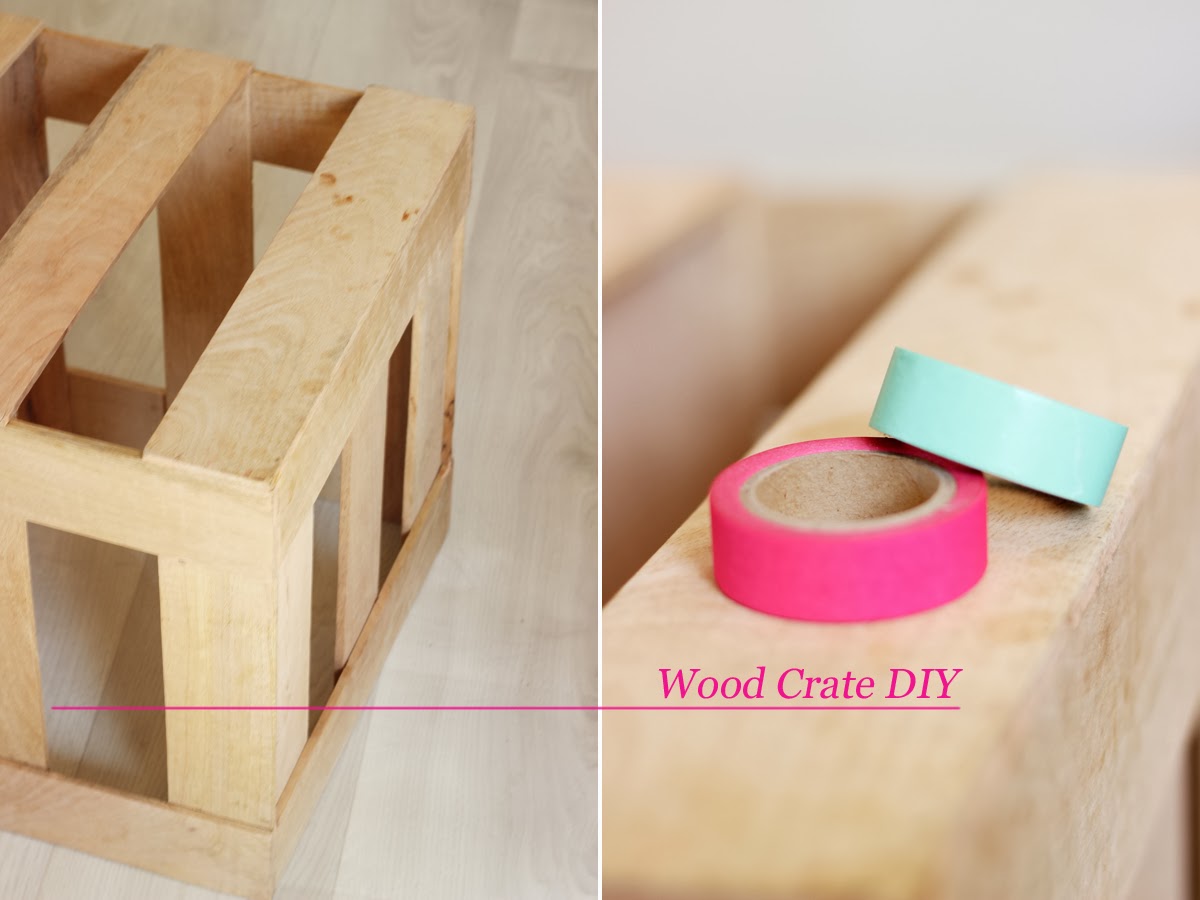
I turned them over again and again, waiting for inspiration to strike. Meanwhile, I decided I would paint a geometric pattern on top, without knowing what they would be. I cut masking tape in the pattern I was thinking of, but while I stuck it on the crates I fell in love with the shape the tape was making. I quickly decided to forget about the paint, and substituted masking tape with Washi Tape. And I am so happy with the result.


Using a ruler and a pencil, I lay out the corners of the design. I then stuck the wash tape on and with an exacto knife I cut off the edges.
Other then the fact this leaves no mess behind, you can change the Washi Tape pattern whenever you like. You can use different colours, patterns - whatever, and you don't have to be worried about not liking the end result. It's so easy and fast, you can always just redo it.

Trivets from my Shop

At this point it was clear I would be using the crates as tables. Because there are big gaps between the boards on the table, I had some plexiglass cut to size and lay it on top of the Washi Tape pattern. This also protects the tape from spills and little hand that like to peel stuff. Bonus - you can wash spills and fingerprints with a sponge in your sink.


You can use these tables as side tables by your sofa (or rocking chair:), you can even nest them to take up less floor space- and push them into the center of the room when you need them. The neon colours give a really nice contrast to the wood, and the geometric pattern is a bit of an unexpected surprise.
And I love surprises.
So are you coming for coffee?
Elisheva


Monday, September 2, 2013

DIY Clay Gift Tags


Hello Everyone,
In Israel we are nearing the High Holidays which means gifts and more gits. I have been very busy at the studio, sending packages to happy givvers. When I give gifts, I like to add a little extra something to make them feel more personal. So today I wanted to share a DIY for clay gift tags which add that personal touch and make your gift really stand out.  You don't have to be a talented crafter with time on her hands - this one is simple and fast and looks chic and modern.


What's cool about these tags is that they're ver versatile. You can make them into key chains, or tie them around silverware or napkins at every place setting that your guests can take home. I'm sure you'll have plenty of new ideas once you try.


So here is what you need:
- Polymere Clay in white
- Some sort of rolling pin
- A cup to make circles or a dull knif for any freestyle cutting you'll be doing - I used a butter knife. Don't tell my guests:)
- Rubber Stamps - I used letters but you can use shapes as well.


Roll out the clay and make your shapes. Make a small hole for the ribbon. As for the shapes, I made some circles with the cup, then a couple of oval tags - and some fish.
Why fish?
1. Because fish are pretty and easy to cut with a butterknife and
2. Fish are a big symbol for the Jewsih New Year - Rosh Hashana, specifally the fish head. It was once customary to searve a fish head at the dinner table (disgusting, right?) and to bless each other with the saying "may you be a head and not a tail". What it means is that you should be a leader. So we don't searve fish head anymore, but we still wish each other to be heads, not tails:)


Now is the fun part. Stamp away, preassuring the stamp as much as you'd like.


Bake the tags according to the instructions on the clay, and Voila!
You now have Clay Gift Tags for all of your gift givving needs.
You can personlize these with names, or messages like I did. I also added some gold leaf to one of the fih, but they look great in white, too.


And if you like the wrapping papers I used, you'll be happy to hear I'm giving them away in the next post a a printable to download along with other fun prints.
So, untill nex time -  I wish you all to always be heads, never tails.
:)
Elisheva


Tuesday, July 9, 2013

Big Bubble DIY

If you've found yourself looking up one of these phrases on Google:
1. Activities for summer vacation
2. Stuff to do with kids during summer vacation
3. Cool things to do with kids that are fun and not too messy and photograph well

You've come to the right place.


My childhood memories are filled with bubbles. Growing up in the US, the bubble bottles were kind of chubby, and had a really sweet smell, while in Israel, till this day, the bottles are really thin and the smell is soft. We'd run out of bubble juice so fast, and then my mother would fill them with dish soap solution, but it just wasn't the same.
Maybe it's the nostalgia, or maybe it's the fact that bubbles are THE BEST at any age, during the summer I'd say we go bubbling about once a week.
I fill a huge bowl with home made bubble solution, and off we go to the park.
As for the wands, here is a simple DIY you could do with just about any cotton weave strap (it would probably work with synthetic as well) or rope you may have. I use leftovers from the strap we use for our constantly breaking blinds. I attached two plastic hoops to the rope and knotted them in place - place them fairly close together so a child (or adult, no judgement) can easily hold on in each hand, then close of the rope. If you don't have hoops, no worries! Just make a loop with the strap and tie it in place.


My oldest tied the rope to a stick, and my youngest followed his lead.


The cool thing about these bubbles (other then the fact that they're huge) is that they are great for and little kids and big ones (and there mothers, of course). It takes some practice getting it right, which is great for the older ones, but sometimes the wind makes bubbles on it's own, which is great for the little ones.


How does it work? Hold a loop in each hand and bring them close together. Dip the entire thing into the bowl, making sure it all gets covered. Slowly bring your hands out and separate them  - the strap will have a "wall" of soap on it. 


You can then blow a bubble with your mouth, stand across the breeze, or swirl around creating your own breeze.


 Wanna try this at home? Here is the recipe we use:


Just add 1 cup of dish soap to 12 cups of water, add 2 tbsp. baking powder (not soda) and 1 cup cornstarch. They say it help to let it rest, but I can never wait that long.


If you have a different recipe, or any other bubble related ideas, fell free to post on the comment section.
See you next week,
Elisheva  


Sunday, June 2, 2013

8 Crazy Nights


The Holiday season is over, but I still have some sweet memories... Those of you who are following my Facebook Page  may have seen how every day of Chanukah (8 days in total) I showed an easy DIY to make any simple mug into a clever and pretty one. The project started out with 8 simple (OK, boring) mugs, and finished up with8 beautiful inspiring projects that would make the Queen Mother (Martha, I mean you!) proud.
Mugs were an easy choice - I love my coffee! And you can never really have anough mugs around the house. And with winter in full swing, cuddling up with your favorite book, (or TV show - no judgment from me!) some cookies (mmm....) and a hot drink sounds like the perfect evening.
So this post is a small party, to let anyone who missed out on all of the Facebook fun to see all of the different projects (which you can do with all sorts of different items - not just mugs)

* Mug no. 1 - Mug Sweater

I felt so bad for the poor little mug, all alone in the dark cupboard, and knit him a small sweater (the internet is crawling with tutorials). Now it has a small cozy, feel free to match your toppings to the cozies color. Because that wouldn't be weird at all:)


* Mug no 2. - A chocolate Heart

To make this pretty Hot Cocoa, melt some white chocolate in your mug (microwave is fine, just make sure you mix it every couple of seconds). Once the chocolate melts, smooth it out with a spoon. Take a heart shaped piece of chocolate and press it into the white chocolate mush. Add warm milk - and Voila!


*Mug no. 3 - Freckles

The idea behind this mugs makeover is fairly simple - polka dots truly are the best.
You can freestyle this one, or make a small stencil, just be sure to use Ceramic Markers (you can get some at most craft stores)

*Mug no. 4 - Vines

This idea is great if you have mismatched dishware in the same color. Using similar graphics give it a "collection" feel. We used a nature inspired theme:


*Mug no. 5 - Chalkboard
It's back to school mug time (wouldn't this make the cutest gift for teachers?)!  For this project you can use Chalkboard Paint, or you can make it (it's easy, I promise!) Mix 1 cup acrylic paint with 1 tbsp grout (the stuff you use in between tiles). This works, really! Paint some on your surface , and chalk away. This idea comes with a warning - you shouldn't drink chalk.


*Mug no. 6  - Saturday Flowers 
I love flowers on the weekends, it makes the house look so put together. I treated this mug as a planter, and judging by the likes you gave it on Facebook - this one was your favorite. Simply put the soil in the mug, and add your plant. Because there are no drainage holes on the bottom, make sure you don't overwater it. This would make a really cute centerpiece (think 5 or 6 of these across a table).


*Mug no 7 - Color Stain
While stains on your favorite shirts can be the worst, a color stained mug looks pretty amazing. Simply dip the mug into a paint filled bowl, and hang on a hook to dry.


*Mug no 8 - A Sweet Gift
Parting is such a sweet sorrow, so to make it even sweeter - I took some cookies and put them into a small bag that we tied with a wide bow (trust me, wide ribbons look nicer on a small gift) and put it into the mug.
Now the difficult part - who do you want to treat?

Who doesn't love a good before and after?


Thanks to all of you flowing on Facebook! This project was so much fun to share:)
Stay tune for next week....
XOXO
Elisheva


Tuesday, May 7, 2013

Who's Afraid of Floral Arrangements - how to make a simple bouquet

 
We all enjoy the basics - a simple black dress, morning coffee (and cookie), a beautiful day and white flowers on the table. 
White flowers are the best! They fit every occasion, look good with any color scheme, and add elegance to every tablescape. I especially love Eustomas, b/c they're pretty but not too expensive.
They're like the serious Roses younger cooler sister.
Turns out - lot's of people get scared when I talk about flower arrangement - it seem to them like it's a job for a pro. And although some bouquets are pretty hardcore, there are some flower arrangements that are so simple - anyone could make (Yes, even you:).
The main idea behind this floral arrangements is that the bouquets are kept really low, making them perfect for a table setting. This way - you can actually SEE the person sitting across from you, imagine that.
So here's a little presentation where you can see the basic steps to arranging a simple bouquet.
The Mission: arranging a couple of small bouquets for a simple table setting
What you'll need: Some flowers (we chose Eustomas) and small tea cups.


What to do: Separate all of the leaves from the stems, and cut the stem. This cut is purely for convenience sake, there will be a bigger more major cut later. Start gathering the flower stems one by one in one hand, Use your other hand to help arrange them at the same height (from the flower). You should start seeing s "dome" of flowers.
Once you have a nice bunch in your hand, bring it close to the cup you're using to figure out how much you'll need to cut so only the flowers show (no stems), and cut all of the excess off.  Put the intire bouquet in your cup, and fluff it a bit. Now make a couple more.... 
Set them all across the table, and keep them there the entire meal:)


So, do you think you'll be arranging flowers any time soon? I'd love to see photos! You can post them up on the studios Facebook Page. And if you liked this tutorial and would like to receive more like it delivered to you inbox, along with DIY ideas, home styling tips, and a little gift - be sure to sign up below this post or on your right.
See you soon!
Elisheva


Related Posts Plugin for WordPress, Blogger...