Showing posts with label entertaining. Show all posts

Sunday, October 20, 2013

DIY Wood Crate Tables

Last post I wrote about coffee table styling ,and now I'm going to let you in on a little secret.
I don't own a coffee table.
This wasn't always the case. We used to have a nice wood table one a friend made us for our wedding. It had a large shelf underneath - a must for a magazine junky like myself - and the tabletop was perfect for our humble entertaining needs.
But then we moved into our teeny tiny Caravan (where we've been living for the past 7 years, waiting for our house to be built) Our living rooms is long and narrow, and the coffee table wasn't helping our somewhat awkward floor plan.

So temporarily, until we move into our new home (they started working on the foundation about two weeks ago, yikes!) we have no intent on buying a coffee table.
How do we have guests over in the living room? I bought two small side tables and put them on either ends of the sofa, and when people come I move them into the middle of the room. I'm always looking for more ideas and sizes for side tables - the kind that can wait silently by the sofa until it's there turn to take center stage.

Geometric Coasters from my Shop

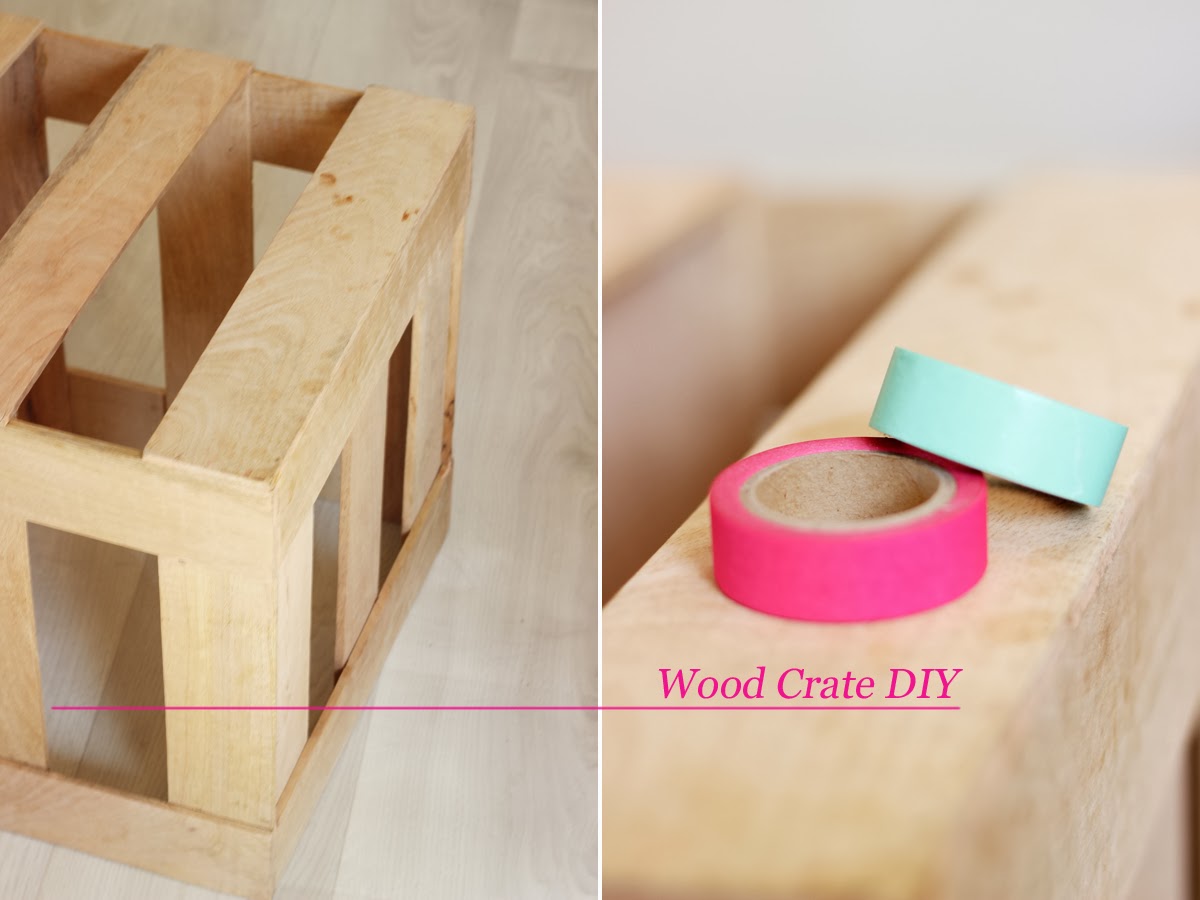
And then the nice ladies at LittleLivingShop contacted me, and asked me if I was willing to create a DIY tutorial with their set of three wood nesting crates. 

Candlestick Stack from my Shop

I said yes, of course.
They sent me the three crates, nesting, with no instructions.
I turned them over again and again, waiting for inspiration to strike. Meanwhile, I decided I would paint a geometric pattern on top, without knowing what they would be. I cut masking tape in the pattern I was thinking of, but while I stuck it on the crates I fell in love with the shape the tape was making. I quickly decided to forget about the paint, and substituted masking tape with Washi Tape. And I am so happy with the result.


Using a ruler and a pencil, I lay out the corners of the design. I then stuck the wash tape on and with an exacto knife I cut off the edges.
Other then the fact this leaves no mess behind, you can change the Washi Tape pattern whenever you like. You can use different colours, patterns - whatever, and you don't have to be worried about not liking the end result. It's so easy and fast, you can always just redo it.

Trivets from my Shop

At this point it was clear I would be using the crates as tables. Because there are big gaps between the boards on the table, I had some plexiglass cut to size and lay it on top of the Washi Tape pattern. This also protects the tape from spills and little hand that like to peel stuff. Bonus - you can wash spills and fingerprints with a sponge in your sink.


You can use these tables as side tables by your sofa (or rocking chair:), you can even nest them to take up less floor space- and push them into the center of the room when you need them. The neon colours give a really nice contrast to the wood, and the geometric pattern is a bit of an unexpected surprise.
And I love surprises.
So are you coming for coffee?
Elisheva


How To Style Your Coffee Table - three rules

I have a confession to make.
I love Design Magazines. Flipping through the pages, daydreaming, pretending I'm in those beautiful photos on the 54th floor looking over an amazing urban view surrounded by pretty things.... A girl can dream, right?

http://media-cache-ec0.pinimg.com/736x/10/e6/a4/10e6a4845c06fe0a9484bc840a47e759.jpg
Take me there! Via here

I don't need any excuses to look through my piles and pile of magazines (which I keep in seperate color coded binders, naturally). After all, it is professional literature (Mommy's working, honey).
But if you really want to learn something from magazines, it's not enough to just flip through them ooohing and aaaahing as you go along. Like I wrote in an earlier post about using inspiration - if you don't ask yourself - what is it about this photo that's working- if you don't translate it into actions - you will have a hard time replicating what you loved, and will probably just end up copying and pasting instead. A more critical approach will reveal the true secrets of the trade that you can use to create different moods in your home.
And b/c last week I spoke about balance, here are three tricks I learned from studying magazines - all about creating balance in your home. Specifically, your coffee table.
http://media-cache-ec0.pinimg.com/736x/ad/3b/a8/ad3ba827378df14bdb286140246556ef.jpg
Marble + Flowers = Love. From SmallShopStudio
Tip Number 1:
Balancing shapes. Are you using a stack of rectangular magazines? Place a nice round bowl on top of them, or place them on a round table.  Too many angular shapes (square sofa, rectangular picture frames, square coffee table...) will give a harsh pointy feeling to a room. Counteracting these shapes with some round ones will give a more cozy and soft feeling. The more round shapes you use, the cozier the room will feel - like in the picture above.
Try It: Look around the room -are you balancing both shapes in the room? Well, are you?

http://media-cache-ak0.pinimg.com/736x/a3/9f/c5/a39fc5c69a2b62f90bf15f4489d16e6c.jpg
The table's kind of cool, too. Via here

Tip Number 2:
The tray.
You've seen it in every magazine, style blog, Pinterest board and Home makeover show - what's up with that?!
To understand the use of the tray, let's take a look at art. Many painting start with a canvas. The artist will decide on the composition based on the canvas. And the composition is one of the most important part of the painting. It will decide the mood of the piece - peaceful or tense? Happy or sad? Busy or quiet? It will lead our eye across the painting. It will set the tone of our reaction to the art piece. 
Trays are the same. 
When we place things in a tray (with purpose, not just chuck them in:) it's like three dimensional art. This will help us lead someones eyes throughout the room, set the mood - you get the picture. Curate these trays with purpose.
How?
Mix useful objects with little nicknacks that make you smile. It doesn't have to be something expensive, just a little private joke with yourself. And remember to keep your colour scheme in mind.
Try It: fill a tray with 5 objects in different sizes. Play around with the composition until you're pleased.

http://media-cache-ak0.pinimg.com/736x/ea/f0/e0/eaf0e0ec881d95b4f468fe9f80891cb5.jpg
Picture via here

Tip Number 3:
Some gold. Or silver. Or bronze.
A little bit of bling goes a long way, weather it's something you picked up at the flea market for a couple of bucks, or a fancy heirloom that's been in the family for centuries - us humans have a long lasting relationship with anything shiny. Going for a dramatic look? Mix metals with black or grey. Want something a bit softer? Go for pinks and pastels. Don't let your stigmas about gold in home decor get the best of you, give it a try!
And now it's your turn. What great home styling tips do you swear by?
Share in the comments section below.
XO 
Elisheva


Monday, September 2, 2013

DIY Clay Gift Tags


Hello Everyone,
In Israel we are nearing the High Holidays which means gifts and more gits. I have been very busy at the studio, sending packages to happy givvers. When I give gifts, I like to add a little extra something to make them feel more personal. So today I wanted to share a DIY for clay gift tags which add that personal touch and make your gift really stand out.  You don't have to be a talented crafter with time on her hands - this one is simple and fast and looks chic and modern.


What's cool about these tags is that they're ver versatile. You can make them into key chains, or tie them around silverware or napkins at every place setting that your guests can take home. I'm sure you'll have plenty of new ideas once you try.


So here is what you need:
- Polymere Clay in white
- Some sort of rolling pin
- A cup to make circles or a dull knif for any freestyle cutting you'll be doing - I used a butter knife. Don't tell my guests:)
- Rubber Stamps - I used letters but you can use shapes as well.


Roll out the clay and make your shapes. Make a small hole for the ribbon. As for the shapes, I made some circles with the cup, then a couple of oval tags - and some fish.
Why fish?
1. Because fish are pretty and easy to cut with a butterknife and
2. Fish are a big symbol for the Jewsih New Year - Rosh Hashana, specifally the fish head. It was once customary to searve a fish head at the dinner table (disgusting, right?) and to bless each other with the saying "may you be a head and not a tail". What it means is that you should be a leader. So we don't searve fish head anymore, but we still wish each other to be heads, not tails:)


Now is the fun part. Stamp away, preassuring the stamp as much as you'd like.


Bake the tags according to the instructions on the clay, and Voila!
You now have Clay Gift Tags for all of your gift givving needs.
You can personlize these with names, or messages like I did. I also added some gold leaf to one of the fih, but they look great in white, too.


And if you like the wrapping papers I used, you'll be happy to hear I'm giving them away in the next post a a printable to download along with other fun prints.
So, untill nex time -  I wish you all to always be heads, never tails.
:)
Elisheva


Thursday, August 22, 2013

Easy Braided Bread - Challah

The Jewish New Year - Rosh Hashana - is nearing, and I thought I'd share one of may favorite holiday traditions growing up.
It has to do with the bread we eat, Challah, on the first night of the holiday. This braided bread is eaten every Friday night and Saturday afternoon throughout the year, but unlike every other week, on the High Holidays it is baked into a round loaf, symbolizing renewal.


Growing up, we used to sneak the Rosh Hashana (New Year)  greeting cards we made under the bread cover (they lay covered until after everyone is seated and the wine has been blessed). When my father would uncover them, he'd always be "surprised" to find all of our handmade cards.
We make Challah bread almost every week, and it's surprisingly easy, especially if you have a Kitchenaid. Our guests are always impressed, and because we make a couple loafs we also give them as gifts no neighbors and friends.
So today I want to show you a few simple way to make any gift (especially the edible kind) look amazing - with only a few things you probably have lying around at home. With these tricks even a store bought granola bar could look amazing, here's the how to.


Wrap a piece of parchment paper (I use simple baking sheets cut into strips ) and tie a brown string around it.
The combination of parchment paper + brown string gives a rustic vibe to anything, making perfect for home baked (or store bought, I won't tell) goods.


Or, you can cut tags out of patterned paper and tie them with a piece of ribbon to your loaf. To get the nice neat bow above, wrap the ribbon around the loaf, string both ends into the whole on your tags, then tie the bow.


You can also make rolls out of the Challah dough. Just roll out the dough into a snake about the length of your hand, and tie into a knot. You can then put the rolls into this chic bread basket, which is actually a linen napkin folded and pressed is an idea I first saw on Martha Stewart blog. I used linen napkins from my collection, pressing with an iron as I folded.
This is how it's done:


Fold both edges towards the center (you can leave a bit so they don't meet each other %100), then fold the open edges back, Voila.
And the recipe for this Challah? We use a revised version of this recipe, this is what it looks like after our revision: 
1 kilo flour
1/2 cup sugar
1 tbsp dry yeast
2 eggs
1/2 cup Canola oil
1.5 cups water - add more if necessary. 
1 tbsp. sea salt

Mix all of the dry ingredients except the salt. Add the oil, eggs and water and knead into dough. You may need to add water - just until the dough is formed. It's ok if the dough is a little sticky, just make sure it's manageable. Sprinkle the salt in and knead for about 5 minutes.
Cover the dough with a plastic bag (not the bowl, the actual dough) - this will keep it moist as it rises. Let it rise for about an hour. Divide the dough into 6  and spread them on a baking sheet.Let them rise again, covered, for another 15 minutes. Braid each 3 pieces into braids, beat and brush an egg over the loaves and sprinkle with sesame and sea salt. Bake in a preheated oven (180 degrees cell) until the loaves brown - about half an hour.
How about you, dear readers? Any special holiday traditions you love? Are they always about food, like they are for me?
Let me know in the comments,
Until next time - 
Elisheva


Thursday, June 13, 2013

How to Make the Best Ice Coffee

It's hot here in Israel, and I'm thinking of ways to cool down. This time of year, I like my coffee cold. And I don't mean all those coffee drinks that are basically coffee slurpies, but rather good old coffee, with ice.
The problem with any drink with ice, is that all too soon you are left with a watered down memory of what your drink used to taste like.  But what if you could turn that disadvantage into an advantage?
What if as the ice cubes melted, your drink became better?
Hmmm...


Coffee Ice Cubes.
All you need is an ice cube tray, and you're set. (I got a new one at the dollar store and I love it b/c it has makes a bajillion mini cubes - so cute!)
First, make some coffee. I made espresso - but you can make anything you like. Carefully pour the coffee into the tray, and freeze.

Now make some cold coffee with the Coffee Cubes, add milk or don't - it's up to you. As the cubes start to melt - Hallelujah!
You can get creative too by adding things to the coffee before it's cubed -  vanilla beans, sugar, Cardamom.... Yummy!


This could work with any iced drink. How about Lemon and Mint cubes in your Iced Tea?


And remember - every drink tastes better when you drink it from a striped straw.


I hope you're having a great summer!
Elisheva

P.S. The coasters I used are from my shop - you can see more here


Tuesday, June 4, 2013

How to clean your house fast - and really impress your guests

We all know the feeling. The house is a mess, laundry on the floor (you're not even sure if it's clean or dirty), toys on every chair, dished from breakfast still on the table. (Who am I kidding? Dinner dishes. Last night's dinner.) And all of the sudden - the phone rings.
Hey, we're really close - can we drop by? In 15 minuets?
How am I supposed to let people into this house?????
I wrote this post with that exact thought in mind - how to achieve the look of a clean and neat home - in record time. Obviously, this can not replace a real cleanup. But it will bring you to the point where you're not shamed in front of your friends - by focusing on a couple of key tasks and taking you out of that overwhelm.
Let's begin!

image taken from here

1. Tip no. 1:
First things first - tackle your kitchen counters. Move all of the dishes and stuff that's cluttering your counters, and wipe them clean. A tidy kitchen is a great start to a house that feels clean. Why? Because clean shiny counters are the best. Try and wash the dishes (or fill your dishwater - lucky) This tip is especially important for those of you with an open layout with no wall dividing the kitchen from the living room.

Image from here

Tip no 2:
Clear all of the large surfaces - coffee tables, consoles, dining room tables - etc. Just take a large laundry basket and collect everything. Shove the basket into your bedroom - and don't forget to close the door. Remember - It's not about cleaning - it's about tidying.  After your guests leave, go through the basket and organize all of your stuff. (Or don't I won't judge:)
*Tidy Tip : An empty table serves as a breeding ground for clutter. To avoid this situation, try placing a large object, or even a couple, on the center of the table. The less room you have for bills/keys/glasses/etc. the more you'll be motivated to put them away immediately. Meaning paying the bills as you get them and not as they're cutting your electricity off. Need some ideas for large objects? Here are just a few - a nice lamp, a stack of books, a pretty vase, a large fruit bowl - anything that leaves less room for clutter.

image from here

Tip no 3:
Take that basket from the last tip, or a different one, and go through the rooms in your house picking up anything that's been misplaced - toys, books, laundry - everything. Take that basket to your bedroom and - that's right - close the door.
Baskets, in general, are great to have around the house - but somehow they're always full (kind of like the empty surface calling out for clutter). That's why I designed foldable baskets. That way when they're empty you can stow them away.

image from here

4. Tip no 4  - secrets from a Stylist
Take a couple of minutes to fluff your sofa pillows. This will "bring them back to life", take the wrinkles out, and make them look soft and inviting.

 
Image from here

5. Tip no 5:
It never hurts to sweep. 
Still have a couple of minutes? Set the table. You can even just stack the plates and silverware on the table. Put out a couple of candles. No one will believe you when you say the house was messy. Who has time to light candles when there is an entire house to clean?!
And that horrible mess in your bed room? That can be our little secret....
If you have any tips for a quick cleanup, please make sure to leave them in the comments. And if you liked this post,  sign up for updates at the end of this post, and invite some friends, too!
See you Soon!
Elisheva


Sunday, June 2, 2013

8 Crazy Nights


The Holiday season is over, but I still have some sweet memories... Those of you who are following my Facebook Page  may have seen how every day of Chanukah (8 days in total) I showed an easy DIY to make any simple mug into a clever and pretty one. The project started out with 8 simple (OK, boring) mugs, and finished up with8 beautiful inspiring projects that would make the Queen Mother (Martha, I mean you!) proud.
Mugs were an easy choice - I love my coffee! And you can never really have anough mugs around the house. And with winter in full swing, cuddling up with your favorite book, (or TV show - no judgment from me!) some cookies (mmm....) and a hot drink sounds like the perfect evening.
So this post is a small party, to let anyone who missed out on all of the Facebook fun to see all of the different projects (which you can do with all sorts of different items - not just mugs)

* Mug no. 1 - Mug Sweater

I felt so bad for the poor little mug, all alone in the dark cupboard, and knit him a small sweater (the internet is crawling with tutorials). Now it has a small cozy, feel free to match your toppings to the cozies color. Because that wouldn't be weird at all:)


* Mug no 2. - A chocolate Heart

To make this pretty Hot Cocoa, melt some white chocolate in your mug (microwave is fine, just make sure you mix it every couple of seconds). Once the chocolate melts, smooth it out with a spoon. Take a heart shaped piece of chocolate and press it into the white chocolate mush. Add warm milk - and Voila!


*Mug no. 3 - Freckles

The idea behind this mugs makeover is fairly simple - polka dots truly are the best.
You can freestyle this one, or make a small stencil, just be sure to use Ceramic Markers (you can get some at most craft stores)

*Mug no. 4 - Vines

This idea is great if you have mismatched dishware in the same color. Using similar graphics give it a "collection" feel. We used a nature inspired theme:


*Mug no. 5 - Chalkboard
It's back to school mug time (wouldn't this make the cutest gift for teachers?)!  For this project you can use Chalkboard Paint, or you can make it (it's easy, I promise!) Mix 1 cup acrylic paint with 1 tbsp grout (the stuff you use in between tiles). This works, really! Paint some on your surface , and chalk away. This idea comes with a warning - you shouldn't drink chalk.


*Mug no. 6  - Saturday Flowers 
I love flowers on the weekends, it makes the house look so put together. I treated this mug as a planter, and judging by the likes you gave it on Facebook - this one was your favorite. Simply put the soil in the mug, and add your plant. Because there are no drainage holes on the bottom, make sure you don't overwater it. This would make a really cute centerpiece (think 5 or 6 of these across a table).


*Mug no 7 - Color Stain
While stains on your favorite shirts can be the worst, a color stained mug looks pretty amazing. Simply dip the mug into a paint filled bowl, and hang on a hook to dry.


*Mug no 8 - A Sweet Gift
Parting is such a sweet sorrow, so to make it even sweeter - I took some cookies and put them into a small bag that we tied with a wide bow (trust me, wide ribbons look nicer on a small gift) and put it into the mug.
Now the difficult part - who do you want to treat?

Who doesn't love a good before and after?


Thanks to all of you flowing on Facebook! This project was so much fun to share:)
Stay tune for next week....
XOXO
Elisheva


A new design

As some of you may know, In my studio I design products, mostly Tabletop, mostly for entertaining. I thought it may be interesting for you if I show you some of the process that goes into designing Homeware. At the end of the post I will also share a new design, so stay with me! Designing a new product often begins with the searching for inspiration. Some of finding inspiration goes with a more generic name - market research. The new design I want to share with you is for Candlesticks.


Left Image : brooks barrow ; Right Image: www.markmontanoblog.com

Left Image:from here  ; Right Image: from here
image from here: www.marthastewart.com

What I took from all of these (and many more images) were how low all of the candle holders were. When I have people over the last thing I want is for them to have to look around the centerpieces to talk to each other:)
On the other hand, sometimes you do want a more dramatic setting. Or maybe you want to put them on a mantle - in which case height could actually be a good thing:)
Thus, the Candlestick Stack was born:
       

I wanted it to be versatile and fit all kinds of different occasions, and esthetically modern yet classic - something that is very important to me. The more time I put into the design, I felt it becoming my favorite for this collection (sorry, rest of my designs:) The model in the picture is actually 3d printing done in plaster (I hope to tell you about this amazing process in another post - it is the COOLEST) It will be done (fingers crossed) in ceramics, in different colors.


What's cool and different about these Candlesticks is the fact that they are stackable. So you could use them together built up high, or break them down  - depending on the situation, each time forming a different design.
If you'd like to see the rest of the designs I'm working on, be sure to sign up below or on your right to get my newsletter straight into your inbox. 
Until next time,
Elisheva 


Tuesday, May 7, 2013

Who's Afraid of Floral Arrangements - how to make a simple bouquet

 
We all enjoy the basics - a simple black dress, morning coffee (and cookie), a beautiful day and white flowers on the table. 
White flowers are the best! They fit every occasion, look good with any color scheme, and add elegance to every tablescape. I especially love Eustomas, b/c they're pretty but not too expensive.
They're like the serious Roses younger cooler sister.
Turns out - lot's of people get scared when I talk about flower arrangement - it seem to them like it's a job for a pro. And although some bouquets are pretty hardcore, there are some flower arrangements that are so simple - anyone could make (Yes, even you:).
The main idea behind this floral arrangements is that the bouquets are kept really low, making them perfect for a table setting. This way - you can actually SEE the person sitting across from you, imagine that.
So here's a little presentation where you can see the basic steps to arranging a simple bouquet.
The Mission: arranging a couple of small bouquets for a simple table setting
What you'll need: Some flowers (we chose Eustomas) and small tea cups.


What to do: Separate all of the leaves from the stems, and cut the stem. This cut is purely for convenience sake, there will be a bigger more major cut later. Start gathering the flower stems one by one in one hand, Use your other hand to help arrange them at the same height (from the flower). You should start seeing s "dome" of flowers.
Once you have a nice bunch in your hand, bring it close to the cup you're using to figure out how much you'll need to cut so only the flowers show (no stems), and cut all of the excess off.  Put the intire bouquet in your cup, and fluff it a bit. Now make a couple more.... 
Set them all across the table, and keep them there the entire meal:)


So, do you think you'll be arranging flowers any time soon? I'd love to see photos! You can post them up on the studios Facebook Page. And if you liked this tutorial and would like to receive more like it delivered to you inbox, along with DIY ideas, home styling tips, and a little gift - be sure to sign up below this post or on your right.
See you soon!
Elisheva


Monday, April 15, 2013

Happy Birthday - To the Blog


How exciting is this?! My first Blog post... Well, technically I have been blogging for about three months, but seeing as I live in Israel, it is in Hebrew.  Now that I have been getting a whole lot of traffic to my Studio Site  from outside of Israel,  I decided to start blogging in English too.
Let me tell you a little bit about myself - Elisheva (I guess that's the equivalent to Elizabeth) Manekin, Industrial Designer,  Mother of two, hostess. I live, dream, and breathe design, and love surrounding myself with beautiful things. I design modern and chic homeware that helps you achieve that effortless style you crave for your home from the comfort of my small trailer (yup, I live in a trailer, but it's temporary until we finish building our house:) in a super rural area of Southern Israel.
What can you expect to find on this blog?
Tips and tricks for entertaining with style, DIY ideas to transform simple dishes into "WOW, you made that?!" dishes, interior design that makes my heart pitter patter, plenty of inspiration, and some behind the scenes of how I live and create.
So let's get started, shall we?


I thought it would be appropriate celebrate with a homemade dessert, but I was lacking in time (=a nice way of saying lazy), I ended up faking it. How does one achieve that homemade look without all the hassle? I'm glad you asked.
Here's what you'll need : store bought muffins/cupcakes, whip cream, and some form of sprinkles.
Here's what you do: Whip the cream (I use my Kitchen Aid but any hand held mixer will do. Of course you can buy whip cream, but it is NOT the same as the home whipped kind, and it really is not too much work to make some on your own). Take the cupcakes out of their package. Spoon a dollop of cream onto each cupcake, add a couple of sprinkles and - you're done! I like to serve these on a trivet from the studios collection (out of stock) with a cup of coffee.


So why does this work? The whip cream heaped on the cupcake makes it seem effortless, and scattering the sprinkles in no particular order help achieve that half homemade half boutique-y look. It's kind of like that skinny girl who just threw on a pair of jeans and a white T-shirt and looks amazing... You never want to look like you're trying too hard.


So, do you have any great ideas for faux - homemade desserts? Do you know any annoyingly good looking girls who don't even try? Let me know in the comments below!
I'd love to see you again, and I'd love it even more if you sign up to the mailing list.
Until next time,
Elisheva


Related Posts Plugin for WordPress, Blogger...